
Inspect the whole opening before choosing a repair
Window-screen inspection is a practical form of pest exclusion. The US Environmental Protection Agency places monitoring, identification and prevention at the center of integrated pest management, or IPM. Its building guidance recommends regular exterior inspections, prompt repair of broken screens and correction of windows that do not close completely.
The inspection should determine where the protective barrier fails. Patching a visible tear will not solve a loose screen edge, warped frame, missing retaining component or gap between the window unit and the wall. A sound screen also cannot prevent insects from entering through doors, vents, service penetrations or other openings.
Screens are especially relevant where mosquitoes are a concern. EPA mosquito guidance recommends installing window and door screens, keeping them tight and covering gaps in walls, doors and windows. The guidance identifies these structural barriers as a way to reduce exposure to Aedes mosquitoes that bite indoors.
Pre-inspection checklist
- Choose a safe position: Inspect from inside whenever possible. Do not lean through an opening, place body weight against a screen or treat a screen as fall protection.
- Use safe access equipment: Upper-floor exterior screens, difficult elevations and windows above obstacles should be handled by a qualified contractor using appropriate access controls.
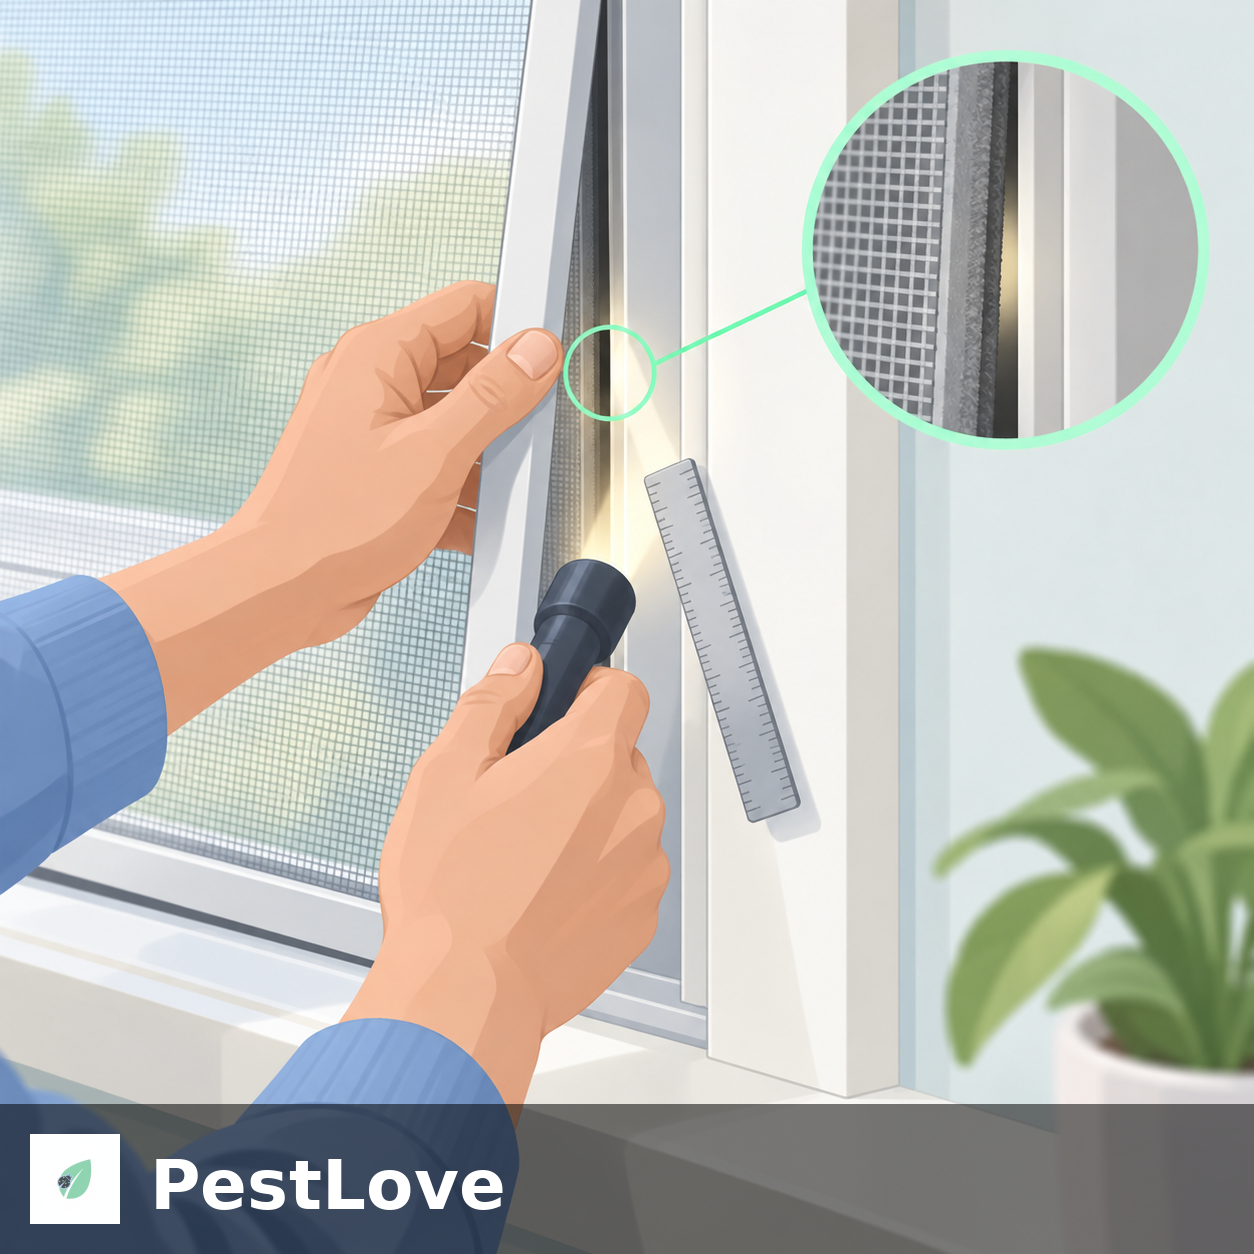
- Gather simple inspection tools: Use a flashlight, ruler, removable labels or painter's tape, a camera and gloves suitable for handling damaged metal or fiberglass mesh.
- Clean only enough to see: Remove loose dust and debris gently. Aggressive brushing can enlarge a tear or dislodge brittle mesh.
- Check the window type: Identify how the screen is retained before attempting removal. Springs, plungers, clips, tabs, tracks and fixed fasteners require different handling.
- Record pest reports: Note where and when insects were observed. A repeated pattern near one window helps prioritize inspection but does not prove that the screen is the entry route.
If wasps, hornets or other potentially dangerous insects are entering near the window, do not probe cavities or disturb a suspected nest. Isolate the area and contact a qualified pest management professional who is licensed where required.
Seven-point window-screen inspection
Inspect the opening in a consistent sequence so that an obvious mesh tear does not distract from a second defect.
- 1. Mesh surface: Examine the entire mesh from both sides where safely accessible. Look for punctures, cuts, abrasion, fraying, corrosion, burned areas and places where strands have separated. Mark each defect without pressing on it.
- 2. Mesh tension: Look across the screen at a shallow angle. Sagging, rippling or unusually loose mesh can indicate that it has stretched or pulled away from its retaining channel. Do not push hard to test tension.
- 3. Retained edges: Follow all four edges. Check whether the spline, gasket, bead or other retaining strip is continuous and seated. Look for mesh that has escaped from beneath it, particularly at corners.
- 4. Screen frame: Check rails and corners for bends, cracks, separated joints, corrosion or impact damage. Compare opposite sides visually. A bowed frame may leave a pathway even when the mesh is intact.
- 5. Fit within the window: With the screen installed correctly, inspect its full perimeter. Check that clips, plungers, springs and tabs are present and engaged. Use a flashlight from the opposite side to reveal open perimeter gaps, but do not rely on light alone to find small defects.
- 6. Window operation: Open and close the sash as designed. Confirm that it reaches its normal closed position and that locks, tracks and weather seals are not obstructed. A screen repair cannot correct a sash that remains partly open.
- 7. Surrounding building envelope: Inspect the junction between the window unit, trim and wall. Record cracked sealant, separated trim, damaged masonry joints, deteriorated wood or penetrations that may provide another route. Do not seal intentional drainage or ventilation openings. Consult the window manufacturer or a qualified contractor when an opening's purpose is uncertain.
Classify the defect before repairing it
Localized mesh damage may be suitable for a compatible patch when the surrounding mesh remains secure and the frame fits correctly. Patch suitability depends on the screen material, damage location, appearance requirements and manufacturer instructions.
Edge separation indicates a retention problem. The correct work may involve reseating or replacing the spline or another retaining component, rather than covering the area with a surface patch. Inspect the channel for distortion or contamination before installing new material.
Widespread mesh deterioration generally calls for rescreening or replacement. Multiple tears, extensive fraying, corrosion, brittleness or repeated pullout suggest that isolated patches will not address the overall condition.
Frame distortion or failed corners requires frame repair or replacement. New mesh installed in a warped frame can leave perimeter gaps when returned to the window.
A poor fit between the screen and window may result from missing hardware, an incorrectly sized screen, damaged tracks or a screen installed in the wrong orientation. Compare the unit with an undamaged window of the same design when available.
A gap outside the screen assembly is a building-maintenance issue. Appropriate work may involve the sash, weather seals, window frame, trim or wall joint. Materials and methods should be compatible with the window system, fire-safety requirements, drainage design and local building rules.
Repair decision checklist
- Patch: Consider only for limited damage in otherwise serviceable mesh, using a patch made for that screen material.
- Rescreen: Select when the frame is sound but the mesh or retaining spline has failed across a substantial area.
- Replace the screen unit: Select when the frame is cracked, permanently bent, badly corroded or unable to remain seated.
- Repair the window: Select when the sash, hardware, track or weather seal prevents full closure.
- Repair the building joint: Select when the pathway lies between the window assembly and surrounding construction.
- Escalate for pest investigation: Request professional identification when insects continue appearing after exclusion work, when the suspected pest could be damaging the structure or when activity suggests an established indoor infestation.
Do not spray an unidentified pesticide into a window cavity as a substitute for inspection. Under IPM, pests should be identified and preventive or lower-risk controls evaluated before pesticide treatment. If pesticide use is justified, select a product labeled for the pest and location, then follow all label directions, precautions and restrictions.
Verify the repair
- Inspect both faces: Confirm that repaired mesh has no visible opening, lifted patch edge or newly damaged area.
- Trace the perimeter again: Check the retaining channel, frame corners and the installed screen-to-window interface.
- Operate the window: Make sure the sash, locks and screen hardware work without scraping, buckling or dislodging the repair.
- Confirm drainage remains open: Verify that no designed weep or drainage feature was blocked.
- Monitor the result: Record subsequent insect observations by date, location and, where possible, pest type. Continued activity should trigger inspection of other entry routes rather than repeated repair of an intact screen.
Where mosquitoes remain a concern, screen maintenance should accompany source reduction and other locally appropriate measures. PestLove's mosquito prevention guidance for gardens addresses outdoor conditions that can contribute to mosquito pressure.
Commercial property priorities
Hotels, restaurants, warehouses and managed residential properties can use a numbered window inventory. Each record can include the building, floor, room, window identifier, defect type, photograph, immediate action, responsible person, completion date and verification result.
- Prioritize reported activity: Inspect rooms or work areas with repeated insect sightings first.
- Protect sensitive operations: Give prompt attention to openings serving food preparation, food storage, guest accommodation and other areas where pest entry has a higher operational impact.
- Coordinate responsibilities: Maintenance personnel can correct screen and window defects, while the pest management provider identifies insects, interprets activity patterns and checks whether other routes are involved.
- Retain records: Photographs and closure notes document that the defect was assessed, assigned and verified. They can also help identify repeated failure at a particular screen design or location.
- Check local requirements: Food, lodging, workplace and building rules differ among jurisdictions. This checklist supports an IPM program but does not establish regulatory compliance or guarantee an inspection outcome.
When professional help is warranted
A qualified window or building contractor should assess water damage, rotted framing, failed exterior sealant systems, glazing problems, inaccessible elevations or uncertainty about drainage openings. Serious or recurring pest activity, dangerous insects and suspected nests require consultation with a qualified pest management professional who is licensed where required. The professional should identify the pest, inspect other likely entry points and integrate exclusion with monitoring and any treatment that is justified.